Supported Services:
- SharePoint
- Blob Storage
Purpose:
Cloud Storage Integration allows Q360 documents to be stored in the cloud, reducing disk space requirements for database backups. Additionally, it facilitates real-time collaboration on live documents, enabling concurrent access for multiple users to a single document source.
Prerequisites:
- SharePoint Site created for Q360 SharePoint Storage (SharePoint Only)
- Storage Account created for Q360 Blob Storage (Blob Storage Only)
- An Admin must have a login to the Azure Portal with App Registration access
- NOTE: Out of an abundance of caution, and to prevent TEST instances of Q360 from uploading documents to production SharePoint repositories, TEST instances cannot be configured for Cloud Storage without support from Solutions360
- NOTE: Enabling Cloud Storage removes “Omit Documents” functionality within Q360
General Setup
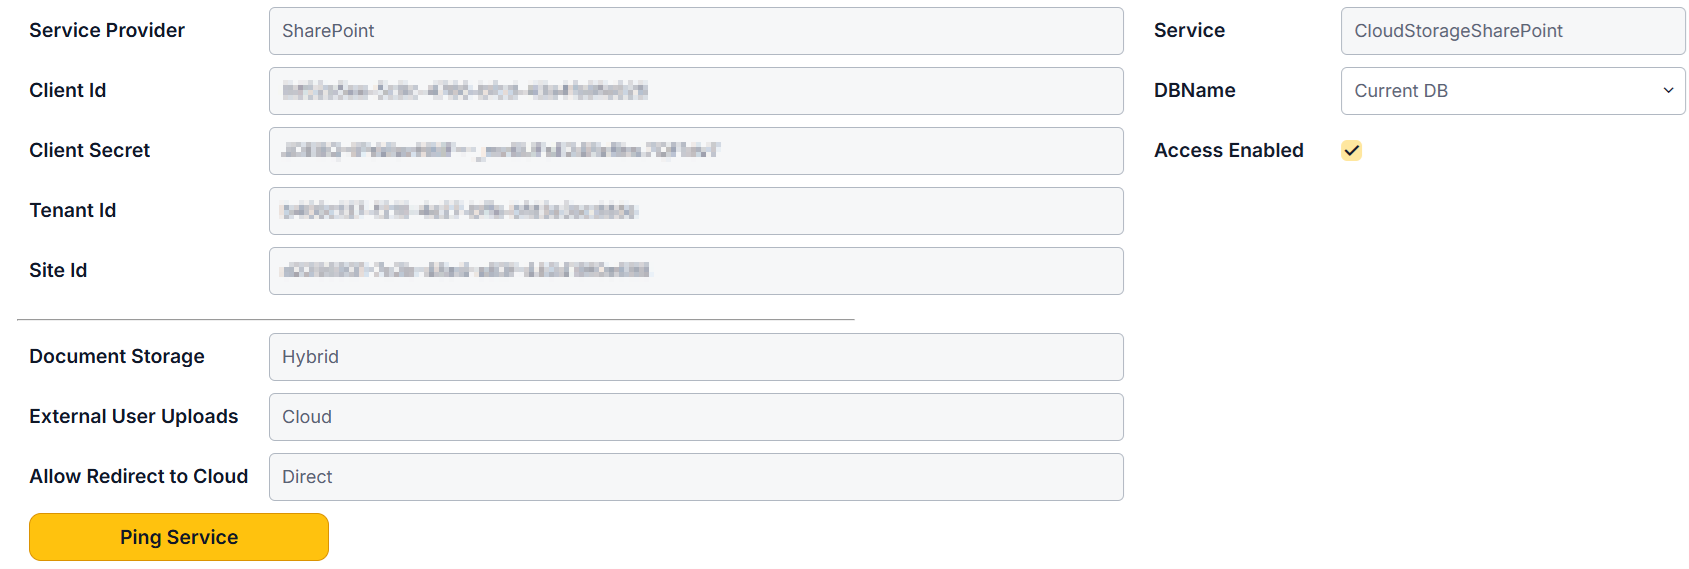
Config Form Path – Maintenance > API Configuration > Cloud Storage
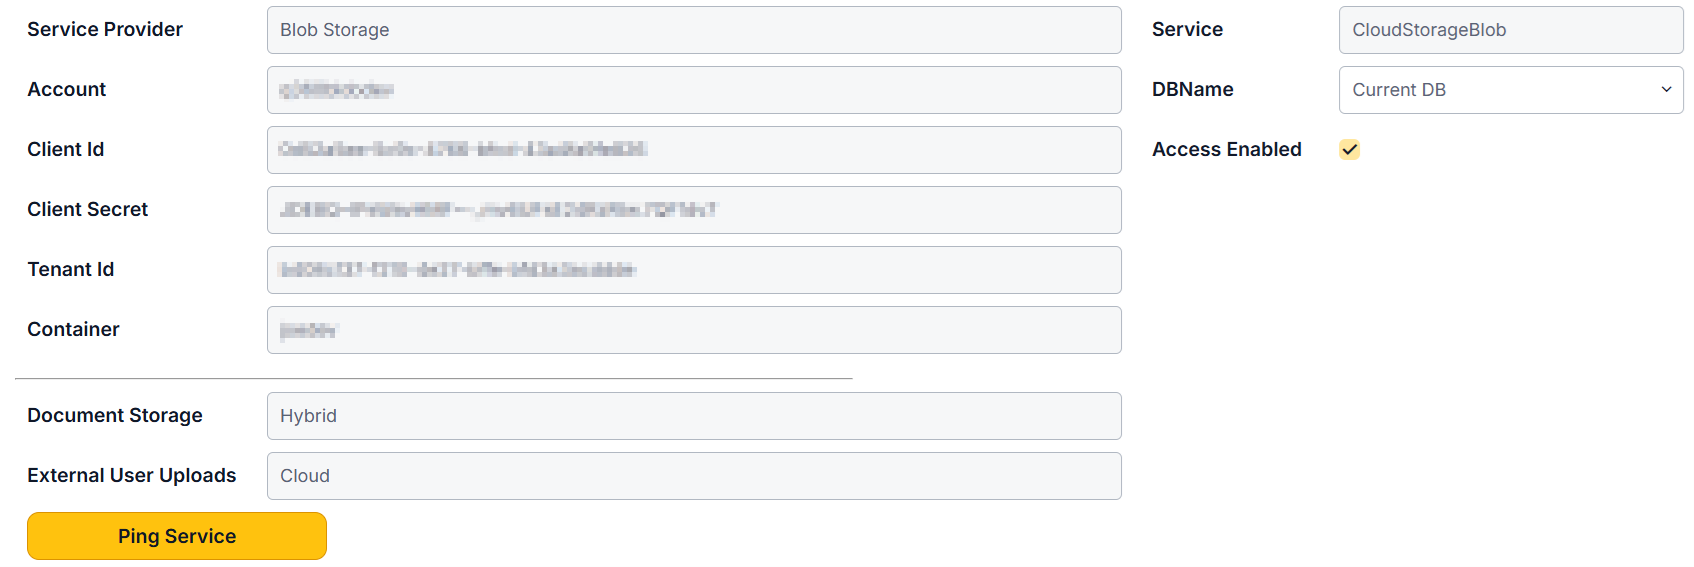
- Service Provider – drop down that determines the service to be used for Cloud Storage
Azure Required Setups
- Client ID, Client Secret, Tenant ID
Navigate to Azure portal
- Go to “App Registrations” and click on “Add”.
- Name the registration “Q360CloudStorage”. Single Tenant. Redirect URI not required.
- Note the client id and tenant id.
- Click on “Certificates and Secrets”.
- Under “Client secrets”, add a new secret and note it for Q360 API Settings.
- Be sure to document the “Client Secret Value” (this is your client secret) and not the “Secret ID”
SharePoint Specific Setup
- SiteID
- The site ID of your SharePoint site may be found by modifying the following url with your site information: https://domain.sharepoint.com/sites/SiteName/_api/site/id
- Permissions
- In your Azure Portal navigate to the “Q360CloudStorage” app registration page.
- In the Navigation Pane, expand “Manage” then select “API Permissions” then “Add a Permission”
- Select the “Microsoft Graph” API
- Select “Application Permissions”
- Search for and grant Sites.ReadWrite.All
- Use the “Add permission” button at the bottom of the panel to save changes
Blob Storage Specific Setups
- Account
- The name of your Storage Account
- Container
- In the Azure Portal navigate to your Blob Storage Account
- In the Navigation Pane, expand “Data storage” then select Containers and “Add container” and give it a name
- Permissions
- In the Azure Portal, navigate to the Data storage container created in the step above
- In the Navigation Pane, select “Access Control (IAM)” click “Add” then “Add Role Assignment”
- In the list of Roles search for “blob contributor” and select Storage Blob Data Contributor in the grid
- Navigate to the “Members” Tab and click “+ Select members”
- Search for the “Q360CloudStorage” application, select it in the list and use the “Select” button at the bottom of the pane to complete the selection
- Click the “Review + assign” button at the bottom of the page to assign and save the role/permission.
Configuration within Q360 – Note: below configs may alternatively be defined in Q360 config settings
- Select Document Storage from drop down menu:
- Q360 – stores all documents within Q360 (not in cloud storage)
- Cloud – stores all documents in cloud storage (in real time)
- Hybrid – enables a checkbox when uploading documents (checked = upload to cloud storage, unchecked = store within Q360 only)
- Cloud (Delayed Export) – works in conjunction with Cloud Sync Process Background Job (see below). Documents will remain within Q360 until this background job is run (may be scheduled)
- Select External Users Uploads option from drop down menu (same as above. Hybrid is not an option for External Users):
- Q360 (default)
- Cloud
- Cloud (Delayed Export)
- Select Redirect to Cloud option from drop down menu (SharePoint Only):
- Share – Q360 will use the API to create a link that shares the document. The link is only accessible to users within the organization at this time (based on Q360 permissions), and will expire based on SharePoint’s default expiration settings for shared links. Security note: sharing this link with a co-worker will bypass permissions
- Share (view only) – creates a link to the document in SharePoint, but the document will display as read-only
- Direct – The URL points directly to the document in SharePoint. Document view permissions for links of this type are determined by SharePoint, not by Q360
- Off – default – Cloud icon column with links to cloud stored documents will not appear in the document grid (only download column will appear)
- Note: The Cloud icon column will still display when using blob storage to denote the document is stored in the Cloud but will have no effect when using blob storage
General Codes Setup (SharePoint Only)
The path where files are stored in cloud storage is driven by the Document Link Type General Code. The Cloud Storage Path can be modified as required.
- Maintenance > General Codes
- Search for Code Title “Document Link Type.” A Code Values grid will open with column Cloud Storage Path
- Cloud Storage Paths will be filled by default, but may be removed or changed by clicking on the EDIT button on the form and then double clicking within the column. These paths identify the folder within SharePoint to which documents will be saved as well as the folder naming convention
- Any Link Type with a Cloud Storage Path of “DISABLED” will always be stored in Q360.
- The following tokens may be used to build a Cloud Storage Path:{{customerno}} / {{company}} – the customer associated with the linked record.
{{siteno}} / {{sitename}} – the site associated with the linked record.
{{linktype}} – the document link type, ex. QUOTE. This is mandatory for syncing externally added documents into Q360.
{{linkno}} – the document link no, ex. Quote No 12345. This is mandatory for syncing externally added documents into Q360. It must be after {{linktype}}.
{{linktitle}} – the document linked records title/description, ex. Quote Title.
{{parentpath}} – the document path for the parent record. Eg. A Project Task belongs to a Project; {{parentpath}} for the PROJTASK linktype would represent the PROJECT storage path. This allows nesting child documents under the relevant project / parent record.
Background Jobs
For detailed information on setting up a background job within your Q360 environment, please see Background Jobs. This is generally done during your new version implementation process or by an administrator.
- Cloud Storage: Archive Documents
- This will queue existing documents in Q360 to be uploaded to the cloud. Note: This background job requires input of a parameter x = @pn_DaysOld where x is the number of days beyond which documents will be archived. For example, if this parameter is set to 30, only documents older than 30 days will be archived. x = NULL will ignore this filter. x = 0 (zero) will archive ALL documents.
- It is recommended that you backup your version of your Q360 database before running this background job
- Performing a full transfer is time consuming. It is recommended that you run this transfer during non-working hours
- Please note that any documents transferred (archived) in this manner will no longer exist within Q360 after this job has run
- This job can be run infrequently or as a one time execution
- This job requires the Cloud Storage: Process Queue job to be executed for changes to take effect
- Cloud Storage: Process Queue
- This will process items in the cloud storage queue
- Queued documents and changes will remain in Q360 until this job has run
- Intended to be run regularly (every 5 minutes)
- In the SQL code, you can set your document limit per run by adding the parameter @pn_Limit = 1000
- In the SQL code, you can add the parameter @DeleteEncodedDocFlag = Y: once the document has transferred to the cloud, it will be deleted from Q360. @DeleteEncodedDocFlag = N: transferred documents will continue to exist in both Q360 and in the cloud
- Cloud Storage: Check Folder Paths (SharePoint Only)
- Validates changes to cloud storage folder paths that may have occurred i.e. Title, Company Name, Contact Name, etc.
- Cloud folder structure (and folder names) will update when this job is run (if changes have occurred
- Best practice – run this job daily
- Cloud Storage: Sync Externally Added Documents (SharePoint Only)
- This job will import document references to Q360 for files uploaded to cloud storage outside of Q360
- Only files in recognized folders (paths that include {{linktype}} and {{linkno}}) will be imported
- This job can be run frequently if real-time visibility to externally added documents in Q360 is necessary. Recommended to run daily
Q360 User Process (licensed users)
- Navigate to the Documents grid on the Doc / User tab
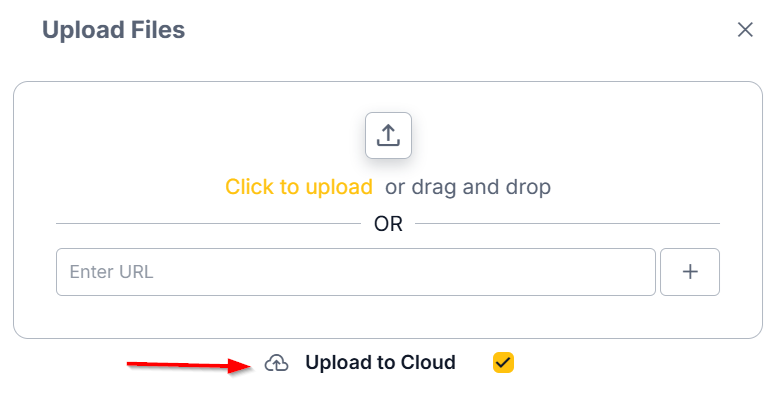
- To add a document, click the ADD button on the grid
- A Document window will open. The window will contain an Upload to Cloud checkbox. If HYBRID mode is turned on, ensure that this box is checked.
- Unless Cloud (Delayed Export) is configured, the Document will immediately upload to cloud storage and will appear in the Documents grid. DocType column will display CLOUD indicating that the document is now in cloud storage.
- Note: If Upload to Cloud checkbox is not visible or not checked, the document will be uploaded to Q360 only and DocType column will display NATIVE
- To download (view) documents stored in the cloud, click the Download button next to the desired item in the Documents grid. This action will open the ShareDrive location of the stored document. Note: if you prefer to download a cloud stored document to your local drive, holding the CTRL button while clicking the Download button will direct you to the default download location to save the document
External Users
External users may only see documents that have been flagged as publicly available within Q360. Non-public documents will not be visible to external users in the Documents grid.
External users will not see the DocType column in the Documents grid. That is, they will not be able to identify the document storage location.
Both Native and Cloud doc types load within Q360 for external users. The download button in the Documents grid will open the user’s default download location to save the document i.e. Downloads folder in Microsoft Explorer.